      |
|
|
|
|
This system encourages you to stick with one weapon type until you max your power.  Red: Low damage, excellent crowd control. Fires a wide arc of tiny projectiles.  Blue: High damage, lousy crowd control. This isn't going to help against stampedes of smaller enemies, But its high damage makes it the weapon of choice against larger targets.  Purple: Medium damage, moderate crowd control. Tapping the fire button produces a stream of projectiles that travel straight forwards. Holding the fire button, you get a single purple beam. The beam can be directed by pressing left or right. Once it hits a target, it will lock on until the target dies, allowing you to freely move around while still hitting the target. This would be great for bosses, except for the fact that the damage is relatively low. |
|
Like primary weapon powerups, they will only improve your shot power if you get one that matches your current weapon.  M: High damage, lousy crowd control. This is analogous to the blue primary weapon.  H: Low damage, better crowd control. Salvos of homing projectiles. Both the secondary and primary weapons force you to choose between crowd control and damage. Different weapon selections are better for different sttuations. |

 Bombs: Again we see the convenience versus damage tradeoff. Yellow responds quickly, but does low damage. Red has a huge firing delay, but does greater damage. You can actually have both types of bombs in your lineup (see the screenshots for examples). In this case, the most recently picked up bombs are dropped first. You start with three reds as player 1, and three yellows as player 2. This is adjustable in the "Options" dialog.  Maximum power pickup. Make sure to have a secondary weapon equipped when you grab these, otherwise you'll only get maxed out primary weapons.  10000 points as you pick them up. When you die with a fairy in you ship, you will be given extra powerups. Think of it as an insurance policy. As far as I know, there are only two in the entire game: these are hidden in levels 1 and 4.  1up: These are extremely rare! There's one hidden in level 3, and I suspect that there are ones in levels 6 and 8, but can't get them. |
|
|
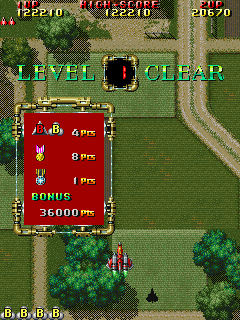
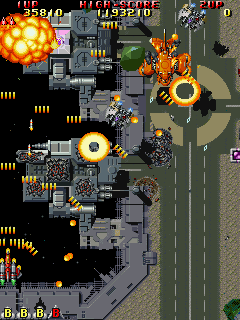
Level 1 Boss >> It's
a big stompy walker with articulated legs! There are two firing
patterns. Just stay in front of it to dodge the first. The
second is trickier (see illustration): you have to fly between adjacent
bullets in a fairly fast moving arc. Keep in mind that your hit
area isn't undersized in this game- this would be trivial in DonPachi. |
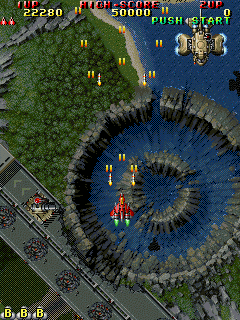
<< Level 1 See the ship in the upper right? Those are the one and only source of weapon powerups and bombs. A
graphical sidenote: In mechanical areas such as cities or space
platforms, Raiden II uses tile based backdrops. In other
places they use free-flowing hand drawn backgrounds like this one.
|
|
Level 2 Boss >> Phase
1: the boss shoots straight forward and releases wave after wave of
kamikaze fighters This is where you start wishing you'd picked
red weapons! Phase 2 begins after you've survived all 14 waves of
fighters. |
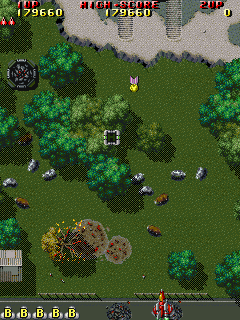
<< Level 2 Level 2 has a few citylike areas in it, but other parts are more rural. Check out the cows! If you look very closely, you can see three tiny chickens below the burning tree. They are about three pixels wide. 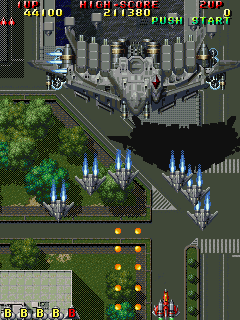
|
|
Level 3 Boss >> This
aquatic boss has a lot of tiny destructible cannons, and is flanked by
turrets on the docks and fighters that drop in from the top. It's
usually best to dodge to the side of his firing pattern rather than
weaving through it, as turret and fighter fire can easily get nail you
when you're fenced in. |
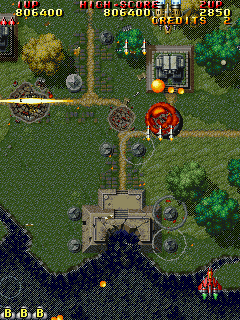
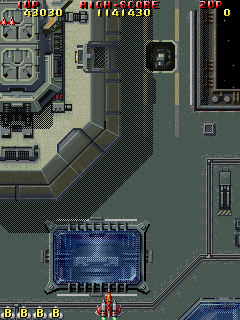
<< Level 3 See the oddly colored grey box? There's an extra life in it.  But if you shoot it, all you get is a medal! You have to wait until the tank you see here crashes into it, releasing a 1up. (You may have to stop firing, especially if you have homing missiles.) 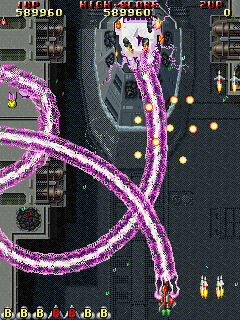
|
|
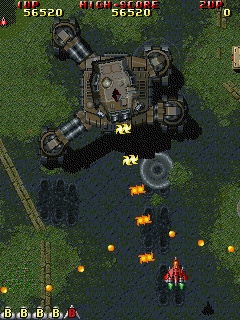
Level 4 Boss >> This
boss comes in four destructible pieces (two have been destroyed
here). The central unit fires arcs of fast projectiles while the
destrutcible
turrets on it fire a second unaimed pattern. It's flanked by
turrets that fire straight at you. As
you play, the boss will activate more and more flanking turrets.
Drawing this fight out could be a good scoring opportunity, because
each tiny turret drops a medal as it explodes. |
<< Level 4 This is
where the level starts to get hard. There are nasty
turrets that fire a pattern very similar to the one the level 1 boss
uses. And the air is full of these fighters that fire pairs
of bullets directly at you. 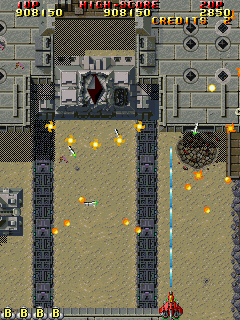
|
|
Level 5 Boss >> This boss has two fairly easy initial phases. Phase 3: |
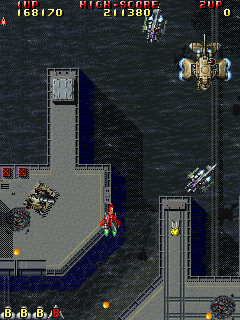
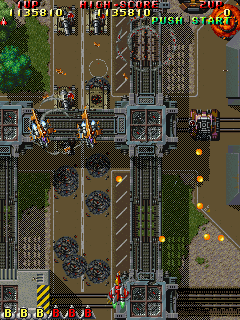
<< Level 5 Once
the railways start, expert to see quite a few turrets like the one on
the right here. These move along sets of rails, which sometimes
lead them into and out of protective buildings. These turrets fire bursts of aimed bullets. 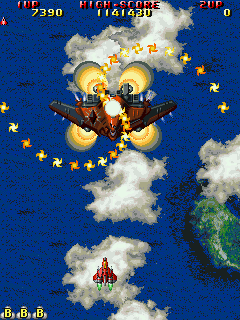
|
|
Level 6 Boss >> I think this is a giant chainsaw, but I'm not sure. Watch out if you see the boss's, err, thing pointing at you. You only see this pattern once you've done quite a bit of damage. Blue primaries and M-type secondaries work fairly well against this boss as well. |
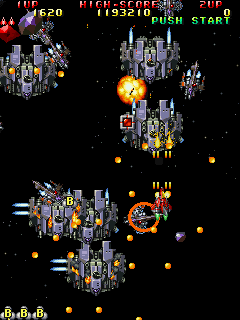
<< Level 6 After a
cinematic sequence, you find yourself in an asteroid field. And
if you didn't make it past the level 5 boss with good weapons, you'll
also find yourself in trouble. The
fighters in this level are extraordinarily fast, and they fire a
lot. In this screenshot they're pinned the player up against the
left edge. High level red is the only weapon that's effective against them. 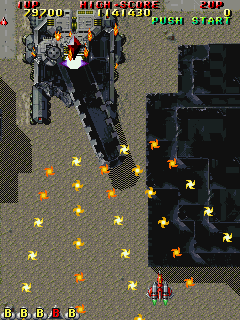
|
|
Level 7 Boss >> During
this fight the giant spacecraft sheds two pairs of booster
rockets. Here it's in the middle of losing a pair, and you can
see sparks shooting out the sides and the protective shields falling
off of the new thrusters. Its gets more and more ornery as it progresses :) You might want to take out the two turrets towards the bottom first, as they fire speedy little aimed shots. |
<< Level 7 In this level all the ground support comes in the form of turrets. There are no tanks at all. Some are only vulnerable while firing, so it can be tricky to take them out before they get behing you. 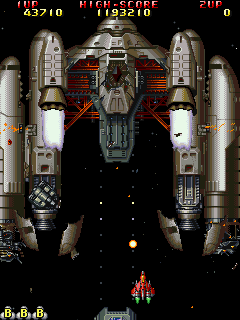
|
|
Level 8 Boss >> Apparently purple is the most evil color of all, because they saved it for the last level. From time to time the boss drops out pairs of tanks, which as usual should be destroyed quickly. |
<< Level 8 Even the basic fighters have been spiffed up. They look much more menacing in their new paint job, don't you think? 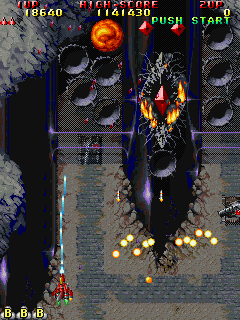
|
|
I've heard that the arcade version features alpha blended shadows, instead of the dithered fakey-ness you see in the PC version. I have yet to verify this. |
TOP | HOME  www.shmups.com © 1997 - 2007 Malcolm Laurie |
